Quick Start Guide for the CleverDrive
Thank you for purchasing the CleverDrive by Cleverdan® Brand. We're thrilled that you chose us and we hope you enjoy the product.
It's never been easier to view, save, share, or transfer photos, videos, files and more in no time at all!
Getting Started
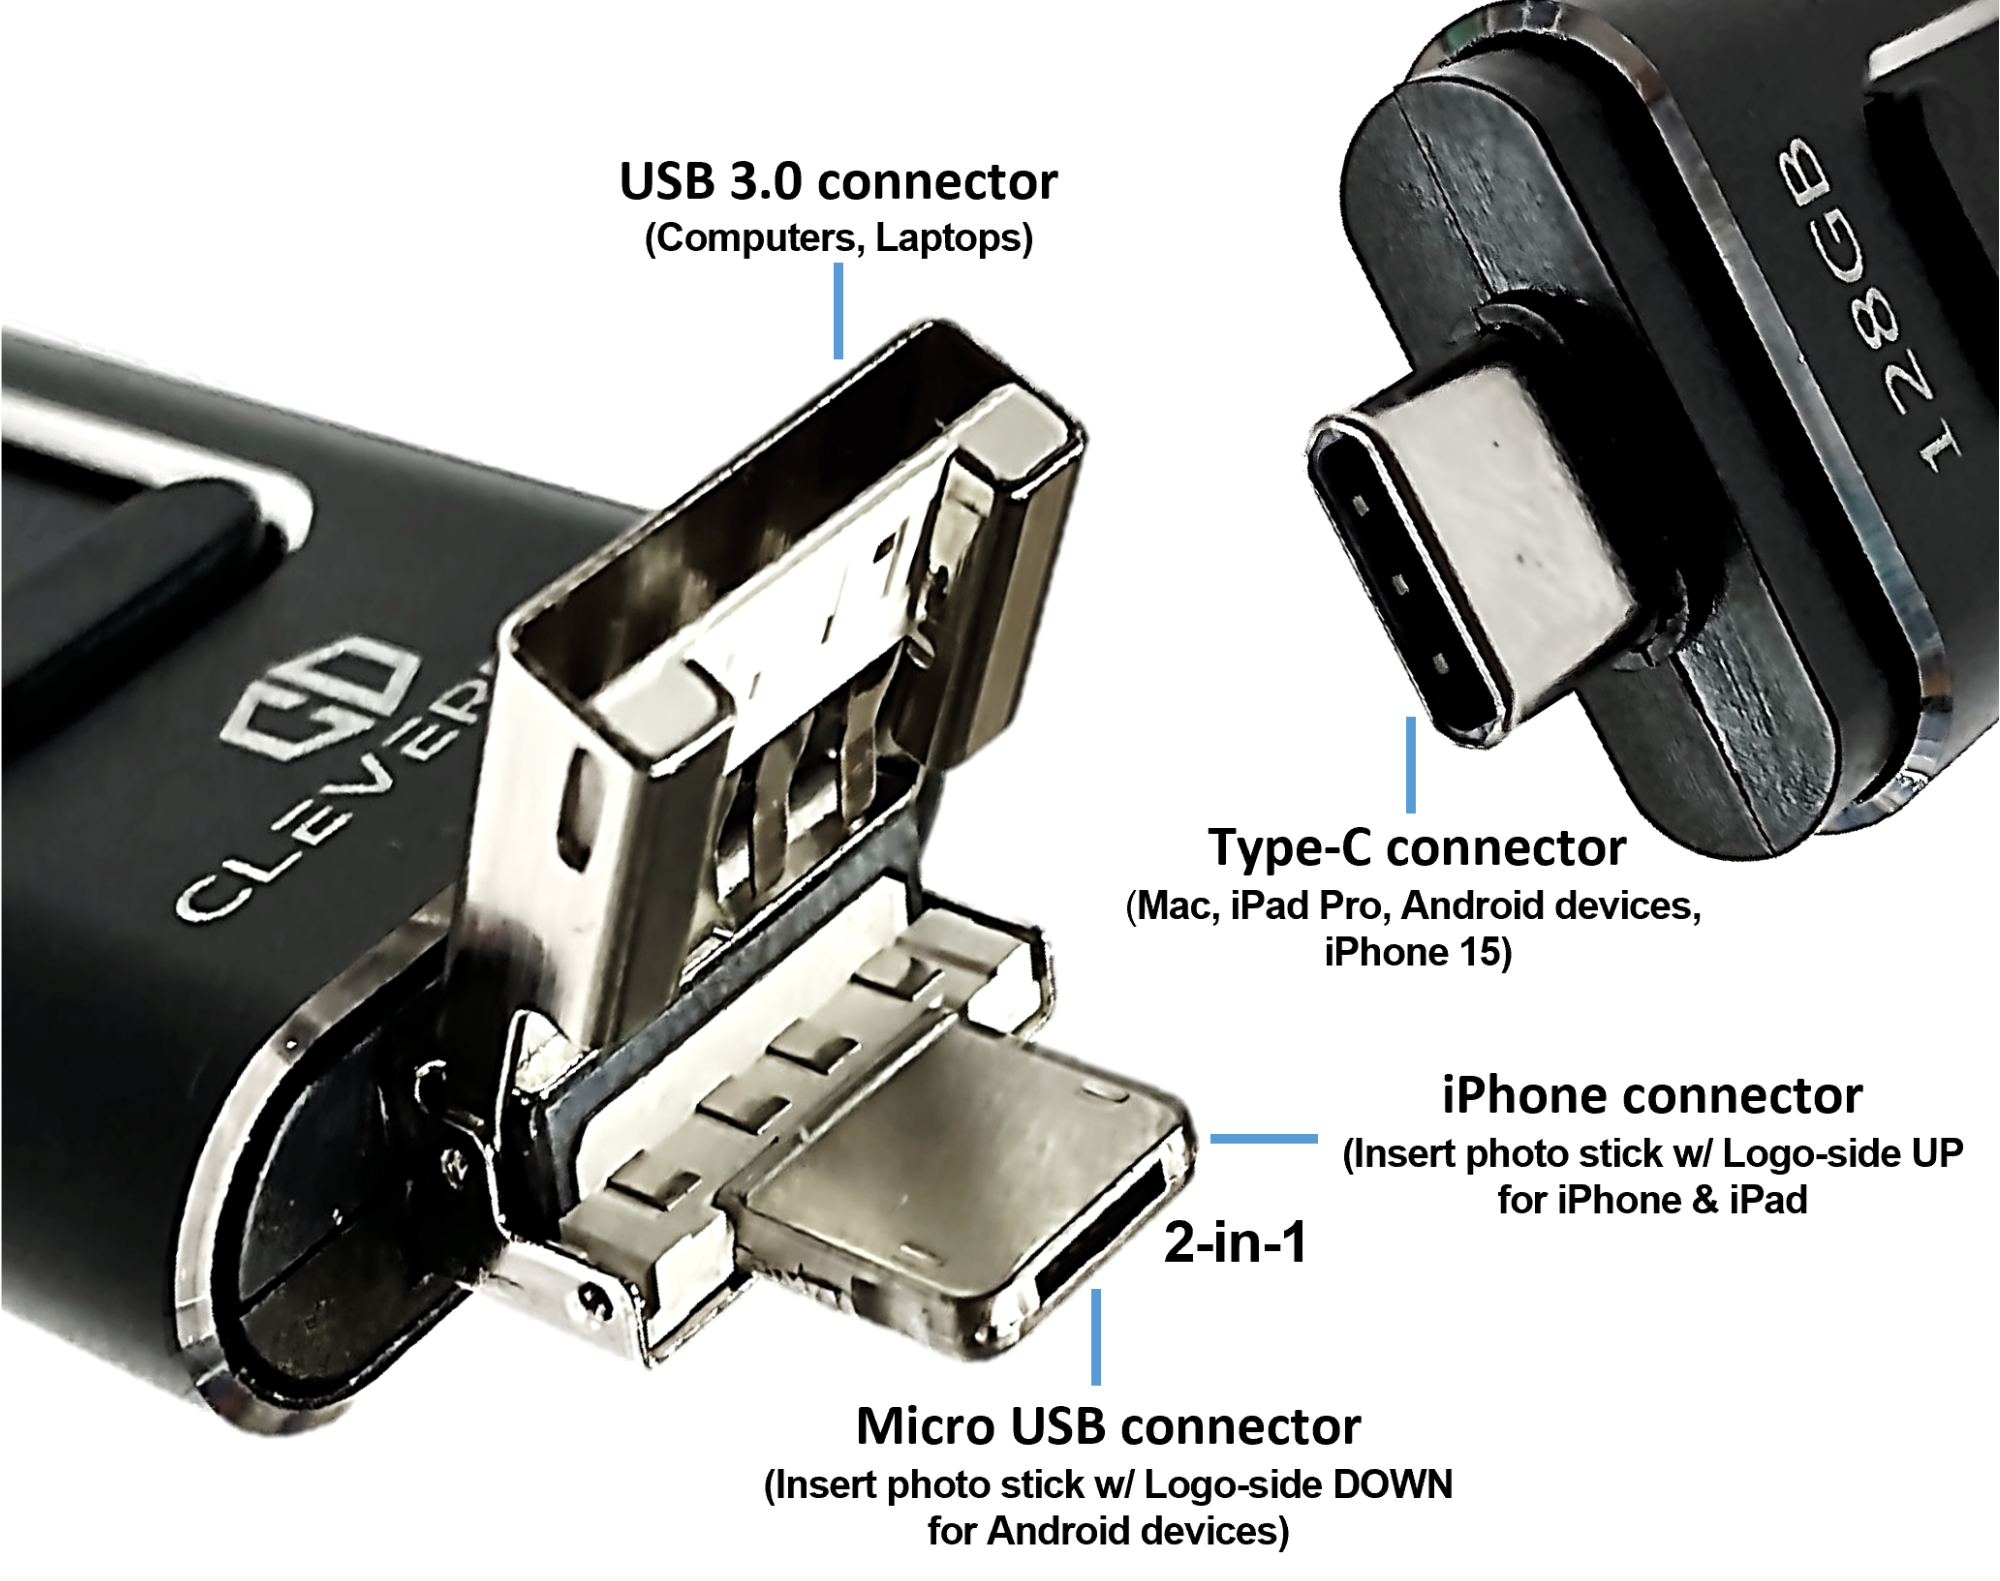
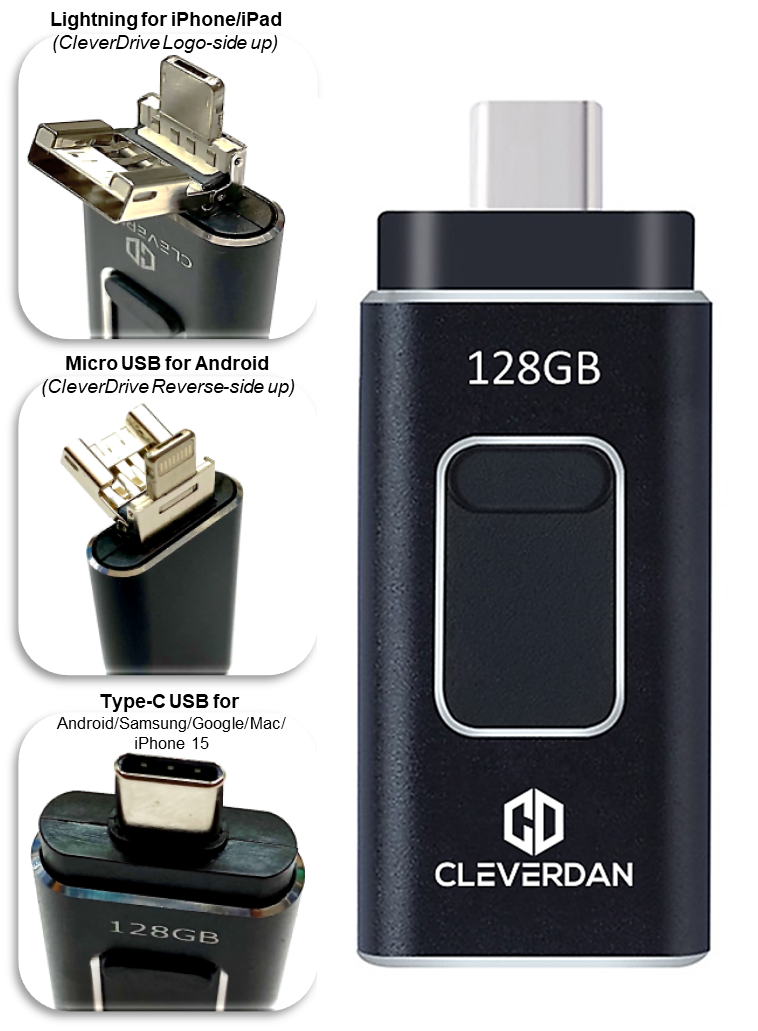
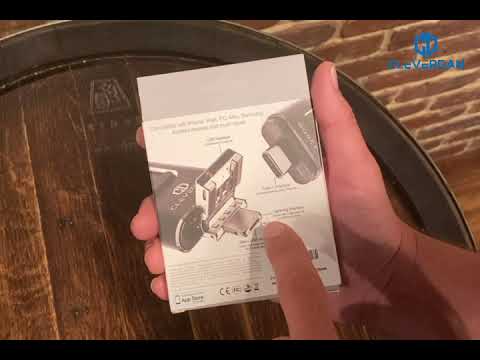
The pictures above illustrate the different connectors and the devices they are used with.
Overview
iPhone/iPad Users with the Lightning Connector (Through iPhone 14):
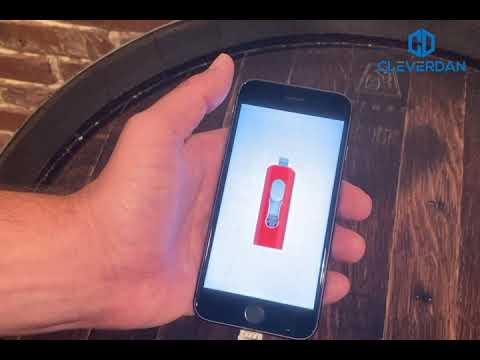
Apple phones and tablets that utilize the Lightning Connector require the Y-Disk App to use your CleverDrive. The pictures above illustrate the different connectors and their uses.
Locate the 2-in-1 Micro/Lightning connector inside of the USB interface. (IMPORTANT: To make sure you are utilizing the Lightning connector side of the 2-in-1 correctly, the Cleverdan logo side of the CleverDrive should be facing towards you and the front of your device.
Note: If you are having trouble inserting the connector, you may need to remove your phone or tablet case.
Once located, insert the connector into the iPhone or iPad, and a notification will appear asking if you want to download the Certified companion app directly from the App Store. If it doesn't automatically ask you to download the app, you can go to the App Store manually and search for: Y-Disk.
Please note that on iPhones and iPads, you need to have the app downloaded on each Apple device you want to use the CleverDrive with.

How to use the Lightning Connector with iOS Devices
iPhone 15 Users (Type-C Connector):
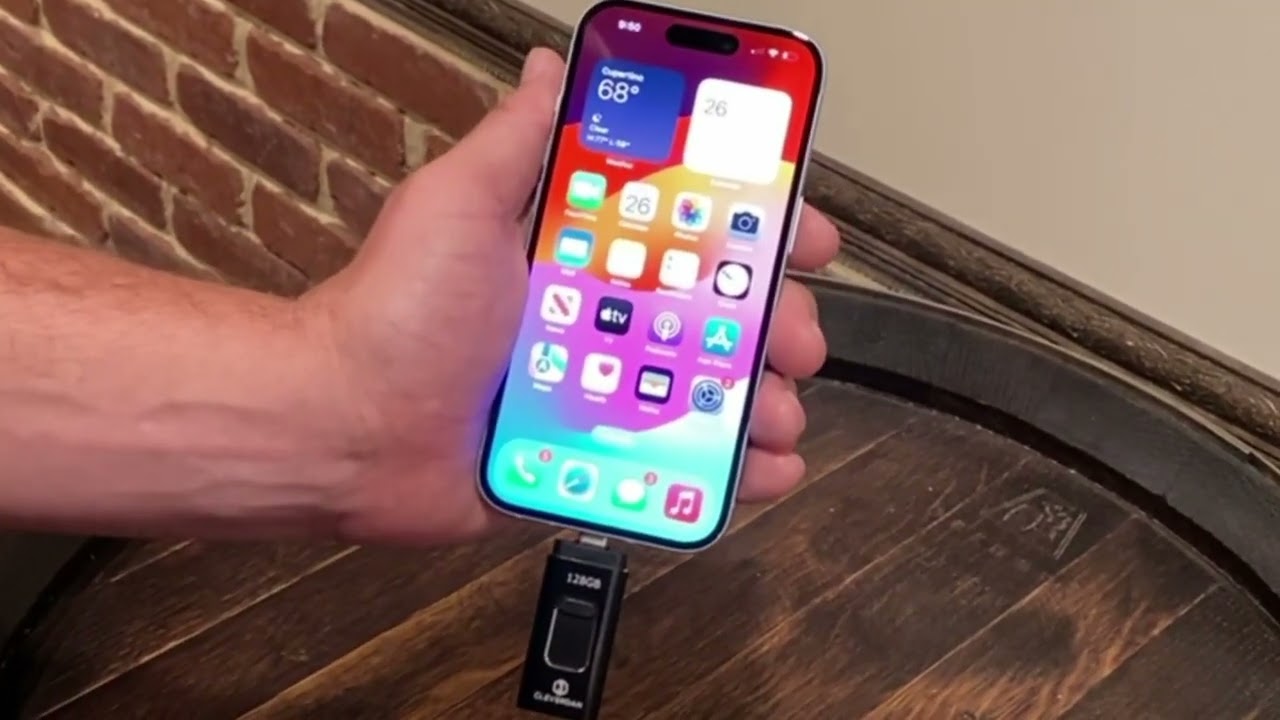
The photos/videos transfer experience for iPhone 15 users is different than its predecessors due to the Type-C connector and Apple no longer requires an app to be used.
To copy images and videos to the CleverDrive:
Step 1: Navigate to the Photos app, and ‘Select’ any photos and videos you want to backup.
Step 2: Touch the Apple 'Share' icon  and choose 'Save to Files'
Step 3: On the next screen, it may default you to the iCloud Drive. If so, back out using 'Browse' in the left-top corner, and in the Locations section, choose the USB Storage which will very likely show up as the Unnamed or Untitled Location.Important Note if you have not previously named the CleverDrive USB Storage folder using your PC or another means, the 'Locations' name may come up as Unnamed or Untitled.
How to use the Type-C USB Connector with iOS devices
Android Users:
For Android based devices, including Samsung phones and tablets (Galaxy, Note, others) and Google Pixel, depending on the device port, either insert the Type-C connector OR the Micro-USB connector. Note: If you are using the Micro-USB connector, open the standard USB interface, and insert the
2-in-1 Micro/Lightning connector into the bottom of your device.
(IMPORTANT: To ensure you are correctly inserting the CleverDrive's Micro-USB connector, the Cleverdan™ logo must be facing towards the back of the device. If you are having trouble inserting the connector, you may need to remove your phone or tablet case.)
As a reminder, NO APP is available or required for Android devices.
To simplify your experience using the CleverDrive with most Android phones and tablets, consider watching these videos, or following the steps provided below the videos.
How to use the Type-C USB Connector with Android Devices
How to use the Micro USB Connector with Android Devices
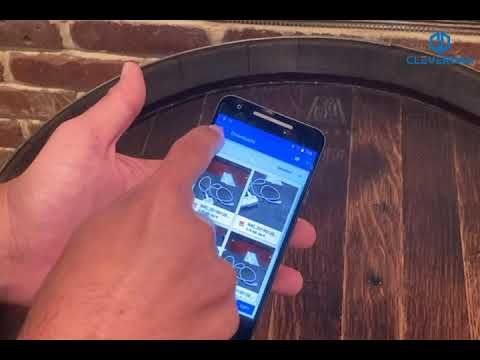
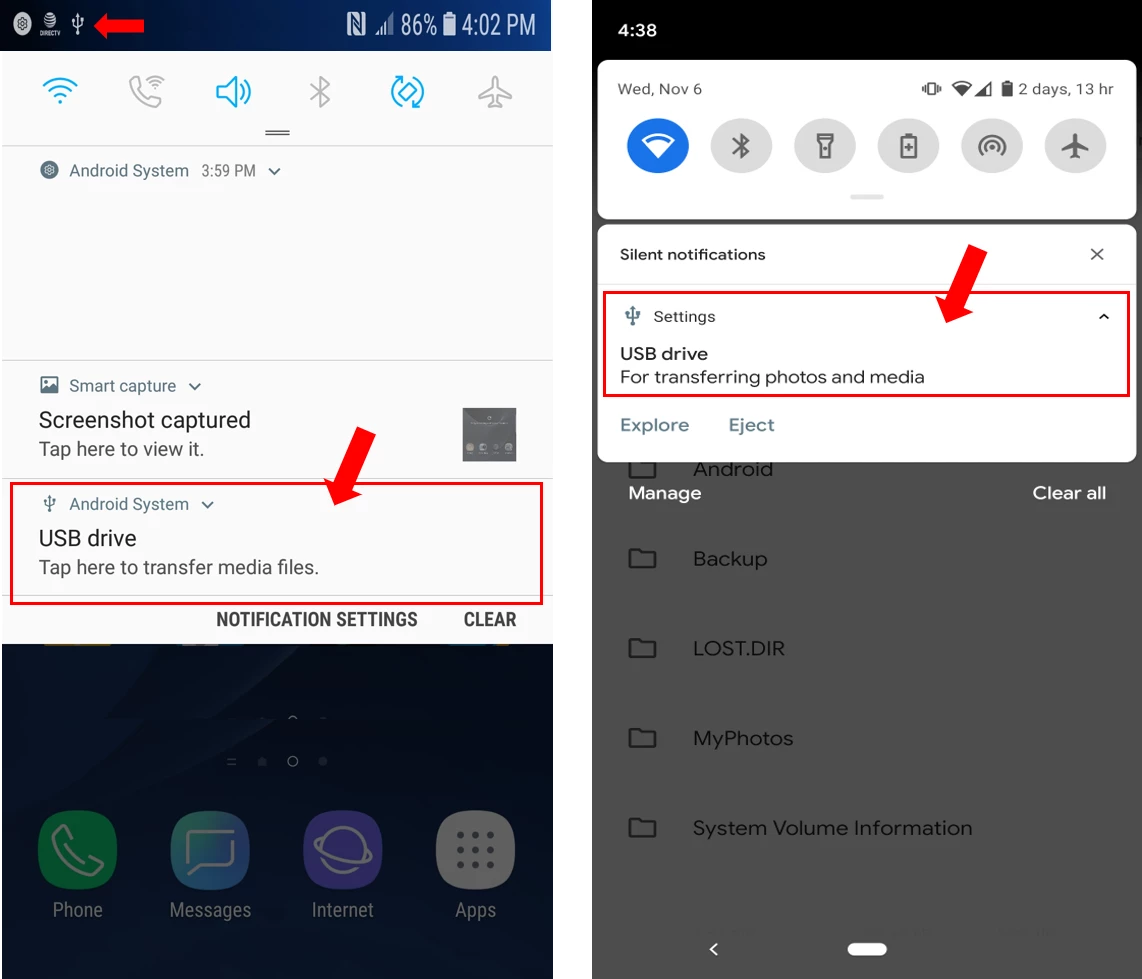
Step 1: Make sure the correct connector is all the way in, and you should see a Notification or small USB icon appear on the top or middle of your device's screen. Pull down the menu, and/or navigate to that notification and Touch it to access the USB Drive's contents.
(Note: Google Pixel devices may require you to format the CleverDrive first before it allows you to access the phone's files and pictures.)
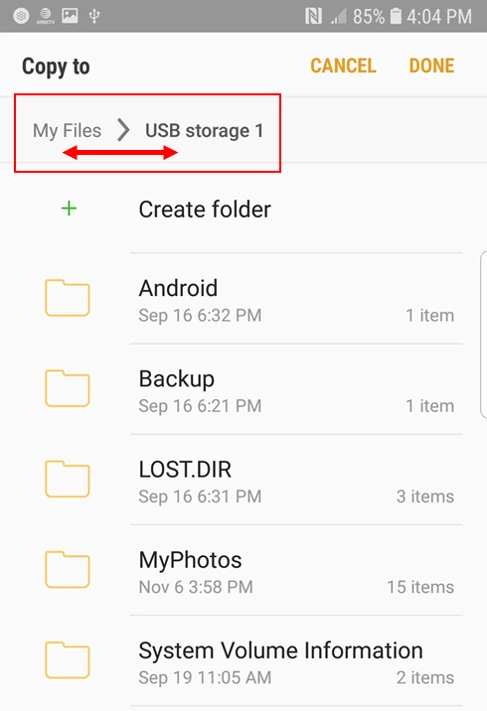
Step 2: In this menu, you have access to your CleverDrive's (USB Storage) contents, as well as My Files, which includes all of the photos, videos, documents, and more currently on your Android device. Note, you should also be able to access your phone/tablet's contents through the My Files app on your Android device.
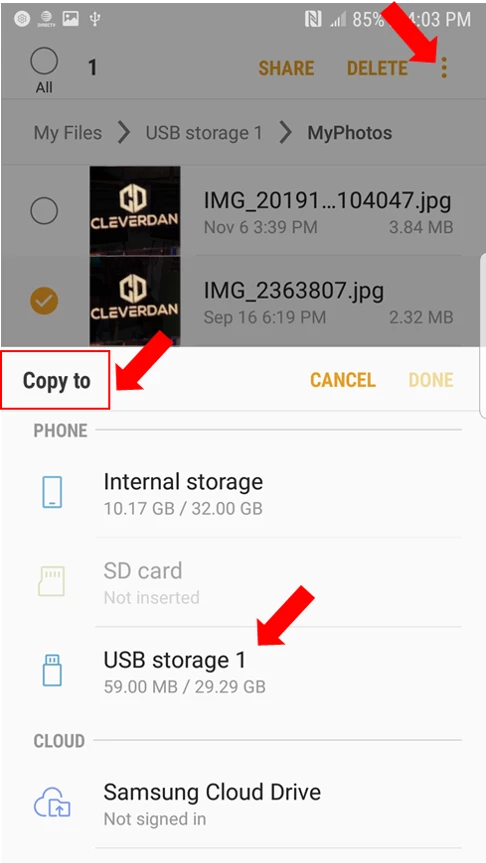
Copy your device's files to the CleverDrive by choosing the My Files menu, ‘Select’ the files you want to transfer, and then select the 3-dot icon in the upper right corner (or Triple Line menu icon on the upper left corner, depending on your phone) in order to 'Copy to' or 'Move' those files. Choose USB Storage as the destination and those files will transfer onto the CleverDrive. You can also choose which folder on the CleverDrive you want to deposit those files into.
Please note to 'Select' files to transfer, you may need to touch and hold the photo or video file in order for it to be selectable depending on your device. From there, a 'Select All' option also may appear making it easy for you to backup everything at the same time. Also note that 'Copy' means that it will copy the files onto the CleverDrive, but they will still also be on your phone or tablet. 'Move' will move the file(s) completely to the CleverDrive.
If you want to do the reverse and move files from the CleverDrive to your device, simply follow the steps above but start in the USB Storage menu (instead of My Files), and then "Copy to" or "Move" those selected photos, videos, music or documents to your device's My Files folder.
A VERY IMPORTANT note: Your experience may differ as many phones and tablets have different looking menus due to different versions of Android software. What matters is that you are able to access My Files, either through this process, or manually through the My Files app on your device using a similar menu to copy and transfer files.
PC/Laptop Users:
Insert the standard USB 3.0 Type-A connector or Type-C connector/adapter into your computer, laptop or tablet and a notification should appear indicating a Removable Disk or USB Drive has been found. Open that directory/folder and you'll be able to drag and drop photos, music, videos, movies and other files directly to the CleverDrive, as well as access all previously saved files on the CleverDrive from other computers, phones or tablets.
MacBook/iMac/Surface Tablet Users:
Simply insert the Type-C connector/adapter into your computer or tablet and a new device icon should appear on the screen. Open that directory/folder, and you'll be able to drag and drop photos, music, videos and other files directly to the CleverDrive, as well as access all previously saved files on the CleverDrive from other computers, phones or tablets.
Using the iOS App with iPhones that have the
Lightning (iPhone) Connector
(iPhone 14 and prior)
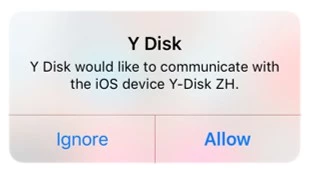
The CleverDrive's Y-Disk app lets iPhone and iPad users take advantage of additional features and functionality that deliver a greater overall experience. After downloading the app as instructed above, and when inserting the CleverDrive into an Apple device moving forward, a notification will appear confirming you want the CleverDrive to interact with the Y Disk app. Always choose "Allow".
The Interface Guide for Using the App is broken into sections. (You can skip to a specific section by selecting it)
1. Home Page
2. Managing Your Files / Encryption
3. Saving Directly to the CleverDrive
4. Automatic Backup
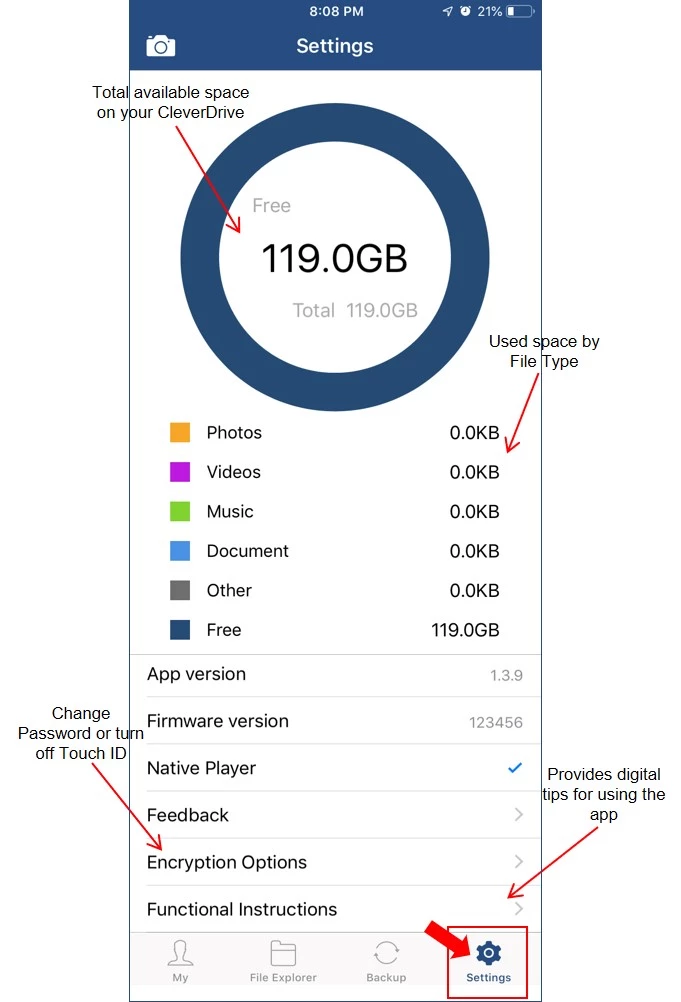
5. Settings Menu
Home Page
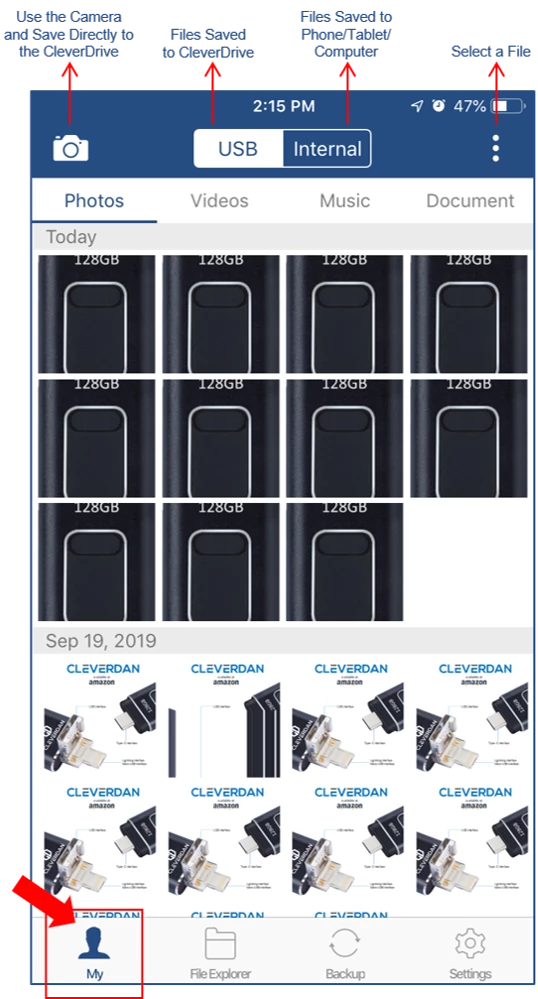
The 'My' Menu allows you to view all of your files currently on the CleverDrive, and internally on your iPhone or iPad. Note that you can switch between the USB and Internal menus at the top, as well as the different file tabs: Photos, Videos, Music, Document.
In the top-right corner, you can choose the vertical 3-Dot icon to Select files for sharing or transferring.
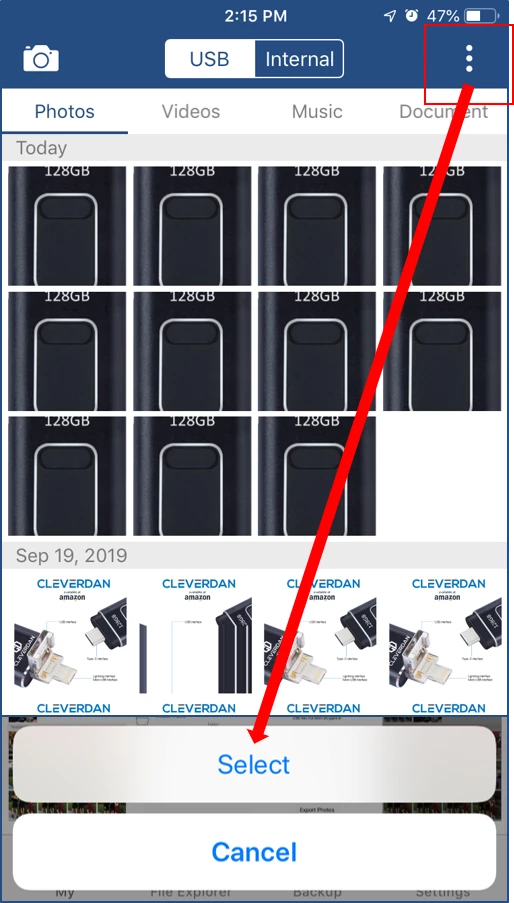
After Selecting Your Files, the following menu will appear at the bottom of the app.

If you are in the USB Menu, the 'Save to' icon lets you copy files from the CleverDrive to your iPhone/iPad. If you are in the Internal Menu, the 'Save to' icon lets you copy files from your iPhone/iPad to your CleverDrive.
The 'Delete File' icon lets you create space by deleting files from your CleverDrive or iPhone/iPad, depending on if you are in the USB or Internal menus. Please be careful, especially if you are using this function from the Internal Menu, as deletion is permanent.
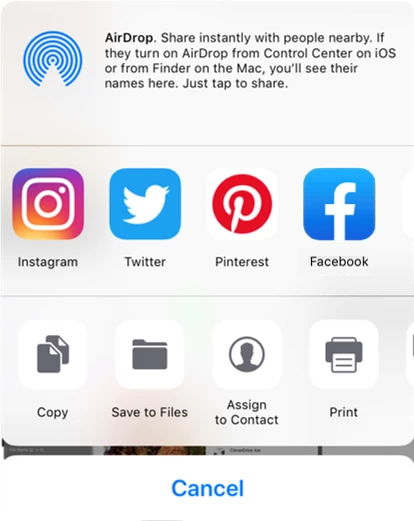
The 'Share File' icon lets you share photos, videos and more through AirDrop, text, email, and post directly to your enabled Social Media accounts including Facebook, Twitter, Instagram, Pinterest, and more! (Make sure you have your Social Media apps downloaded onto your device and that you've enabled sharing)
Managing Your Files
The 'File Explorer' Menu provides you with additional tools to Manage, Organize and Safeguard your saved photos, videos and more. Once again, the vertical 3-Dot icon in the top-right corner offers you further options to interface with your photos and videos.
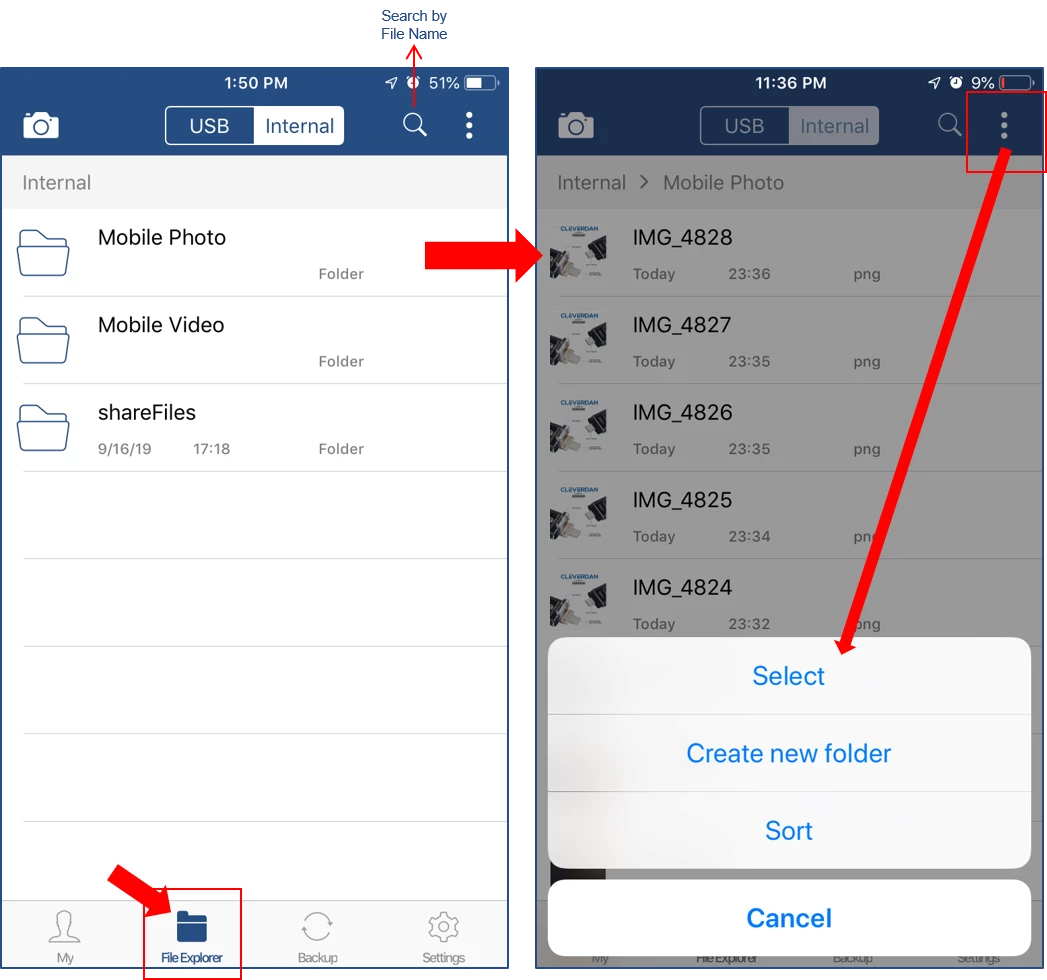
'Select' lets you choose files and opens up a new menu selection at the bottom of the app.
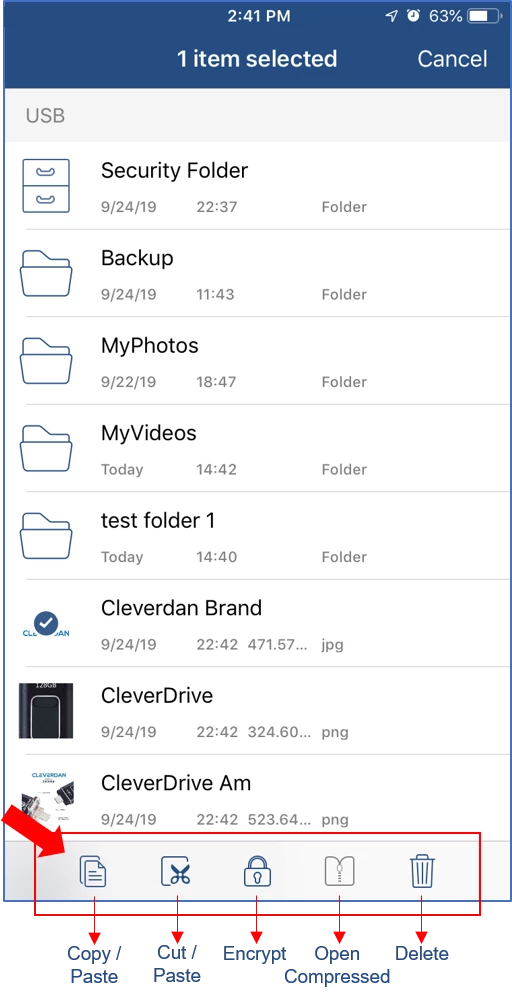
'Copy / Paste' lets you make a Copy of that photo/video(s) and insert it into another folder. After choosing this option, touch the vertical 3-Dot icon again to Paste the file(s) into your folder of choice.
'Cut / Paste' is similar to the feature above and follows the same process. However, the file is moved instead of copied.
'Open Compressed' lets you unzip compressed .zip or .rar files/folders and view their contents.
'Delete' lets you create space by deleting files from your CleverDrive or iPhone/iPad. Please remember that deletion is permanent.
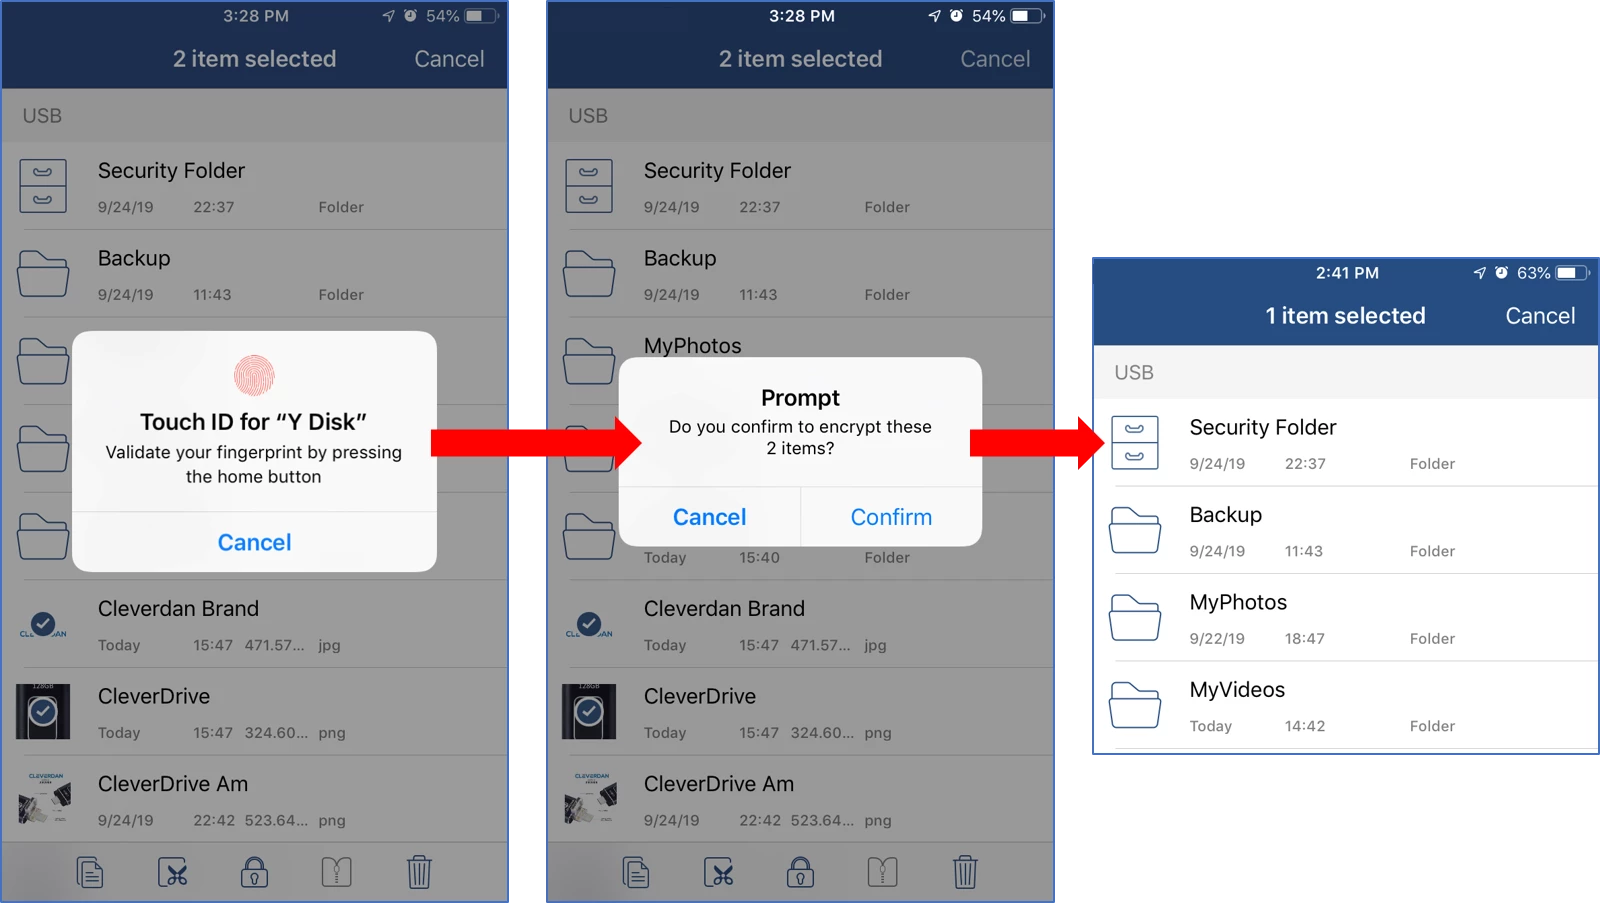
'Encrypt' lets you add another layer of security to photos and videos on your CleverDrive by requiring Touch ID or password protection in order to access them. In choosing to Encrypt a file, Touch ID will be required to validate the setting. (If Touch ID is unavailable, your iPhone/iPad's password will be required.) Once you confirm to encrypt, files will be moved to the Security Folder for viewing which will also require Touch ID validation the first time per CleverDrive use.
After encryption, files can always be decrypted. Within the Security Folder, touch the vertical 3-dot icon in the top-right corner, then 'Select', and finally choose the file(s). The bottom of the screen will now have a 'Unlock' icon for you to select. Touch this icon, and confirm.
'Create new folder' lets you create and name new folders to further help you organize your photos and videos.
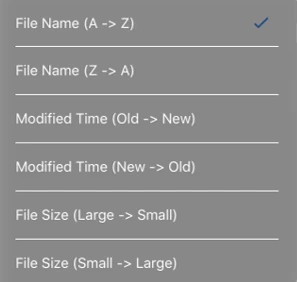
'Sort' gives you multiple options to view and organize your CleverDrive's photos and videos by File Name, Time and Size.
Take & Save Photos and Videos Directly onto the CleverDrive
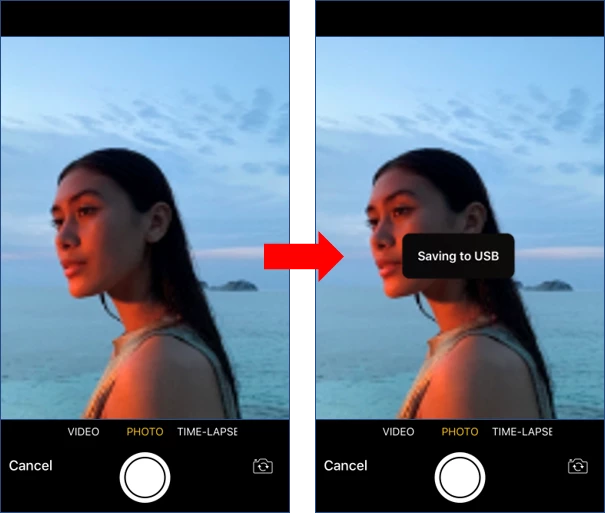
Take and save photos and videos directly to the CleverDrive, instead of using space on your phone or tablet. In order to use this feature, insert the CleverDrive and select the 'Camera' icon from the Top-left side of the app.

From here, take photos or videos like you normally would with your device. Photos and videos are now automatically saved to the CleverDrive.
Backing Up Photos and Contacts
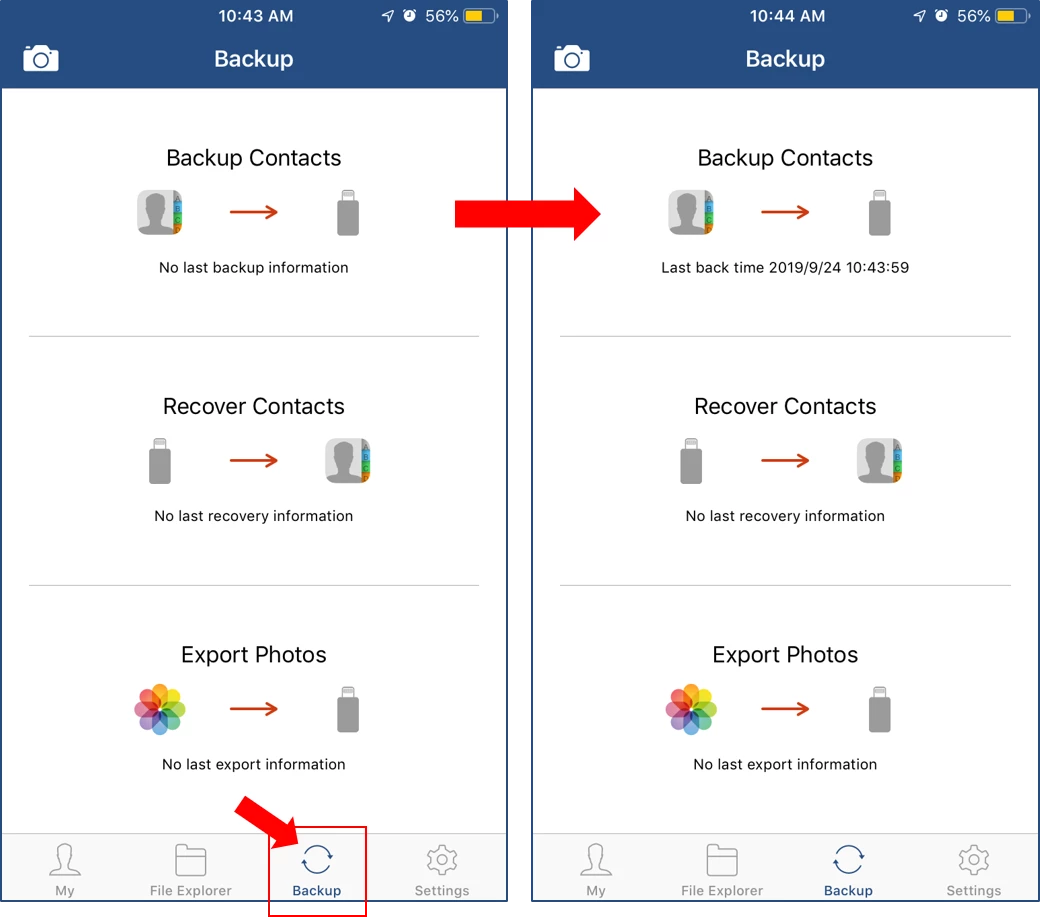
In addition to manually selecting files and copying them to the CleverDrive, the 'Backup' Menu lets you easily and automatically save and store iPhone/iPad Contacts, and all of your Photos, with a single touch.
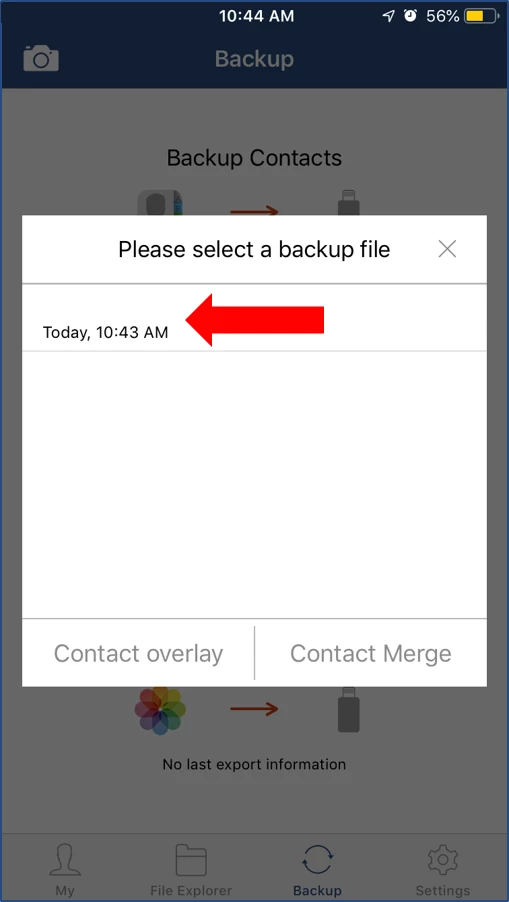
If you ever need to recover contacts because you upgrade your phone or accidentally delete them from your device, contacts can be restored by selecting a previously saved backup file.
Settings Menu
